
In Drupal 8 there is a Tour module in core that is very useful when it comes to web applications. In EK management tools we target professional users with small to medium scale companies. They usually have limited resources and time to spend on back office trainings. This is where the Tour module is very convenient to introduce functionalities to users who can quickly grasp the functions available to manage their back office.
We use the Tour functionality in our pages to guide users in their daily tasks like for instance in the form to create a new invoice or project page:
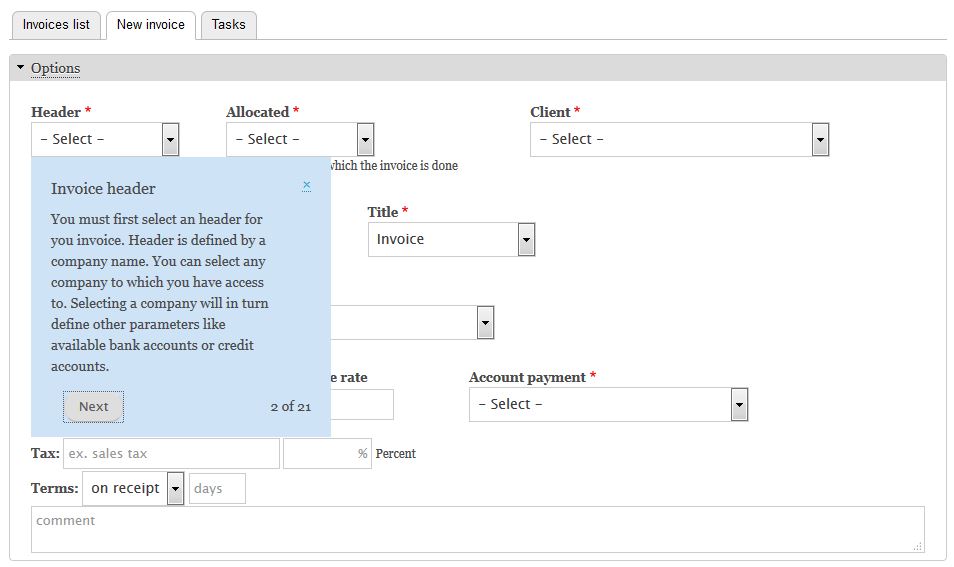
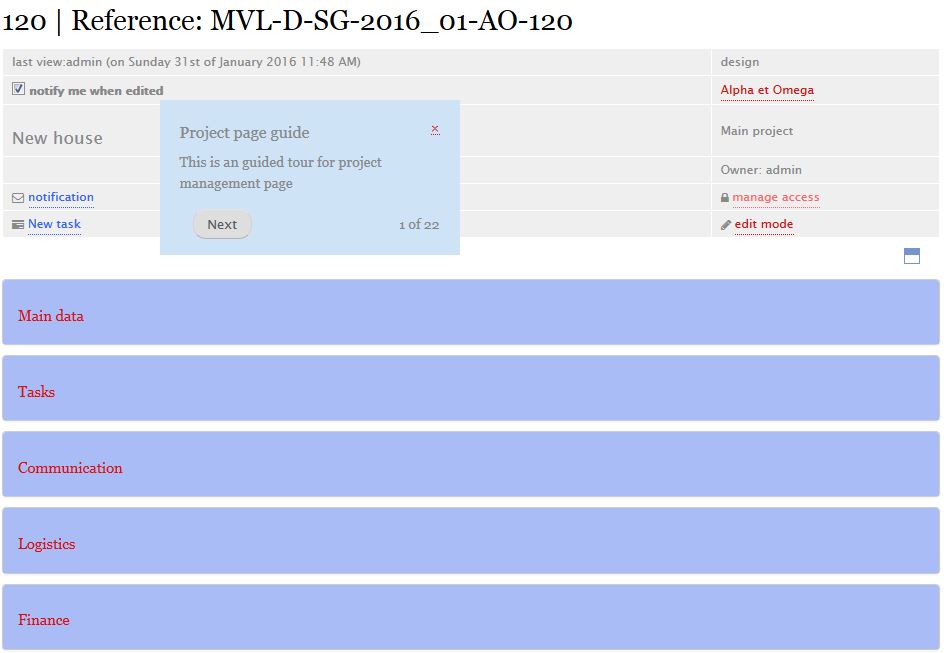
Implementation is actually very simple and results are great from the user experience point of view.
To achieve the above result, simply create a configuration file called tour.tour.invoice.yml. In this file add the properties information:
id: ek_sales.invoice_create
module: ek_sales
label: 'Create invoice tour'
langcode: en
routes:
  - route_name: ek_sales.invoices.create
Those properties are straightforward. The Id must be unique. In "routes", indicate where the Tour will be placed and route_name is referred in the module routing.yml file.
Then comes the tips definitions that will display the actual help text (we just present here the first 3 items as an example):
tips:
  introduction:
    id: introduction
    plugin: text
    label: 'Create or Edit invoice guide'
    body: 'This is an guided tour to create and edit an invoice.'
    weight: 1
  first-item:
    id: first-item
    plugin: text
    label: 'Invoice header'
    body: 'You must first select the header for you invoice. Header is defined by a company name. You can select any company to which you have access to. Selecting a company will in turn define other parameters like available bank accounts or credit accounts.'
    weight: 2
    location: bottom
    attributes:
      data-id: edit-head
  second-item:
    id: second-item
    plugin: text
    label: 'Allocation'
    body: 'In a multi companies configuration type, you can allocate the invoice to a different company of the group. This is used when a company invoice on behalf of another and you want to keep track of internal transactions.'
    weight: 3
    location: top
    attributes:
      data-id: edit-allocation
Again tips properties are also straightforward.
Id is unique. The 'text' plugin is the default display type in core. "Label" will appear as a box title and "body" is the extended description or help text. The 'weight' defines the sequence of tips display. the "attributes" link the tip to a specific element on the page that can be defined by its id (data-id) like in the cases above or by its class (data-class). And finally you can define the "location" of the tip around the element (top, bottom, left, right).
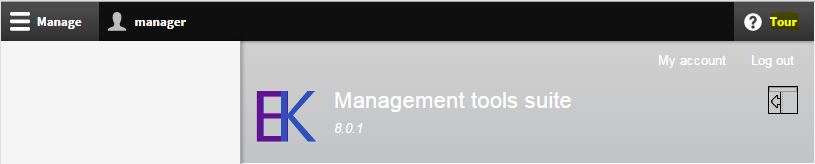
When you navigate to the page where the Tour has been configured, you can now see a Tour button which will start the Tour display:
Feel free to add your comments or suggestion.
Add new comment