
Views is an integrated function from Drupal which allows to build content views from available data. Content views are any filtered data display in a form of table, list or grid.
In this article, the sample view we are building is made of data managed by EK modules for business back office. But it may apply to any data from a Drupal module.
Views are very useful to extract custom data for analysis or compilation. You can add filters and access control to share pages and content.
You can also test the full example below result on our online demo
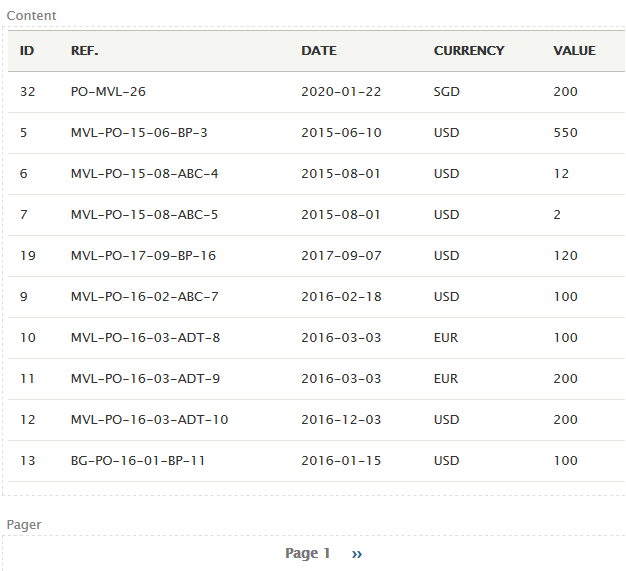
A new custom purchase list view
(check out complete video here as well)
To access view building form you must have permission Administer views. Check with administrator if you need to update permissions in your application.
To access the Views User interface, navigate to : /admin/structure/views
On this page, click the button Add view to start a new content view:
![]()
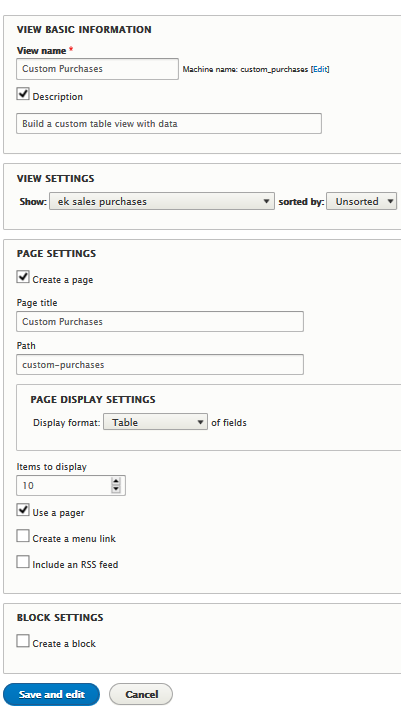
In the subsequent form, fill-up the information needed to create the view: name and description, page title and path (path is the url to view display and can be inserted in the application menu) and display settings as in the example below:
After clicking "Save and edit" we are redirected to the content edit form.
View content building
The first step is to select the fields from content database that will be displayed in the table. For that selection we click on "Add" in fields section:
![]()
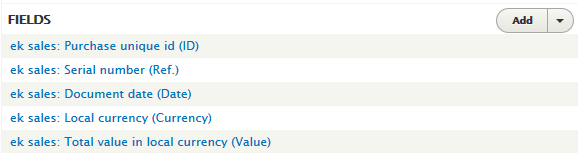
In the field list, we select following fields:
- Serial number
- Document date
- Local currency
- Total value in local currency
And format each field column name.
The view content can be previewed in the lower part of the form:
Add link to field
To improve view display, we are going to add a hyperlink to the serial number to redirect user to a display of the document with full information.
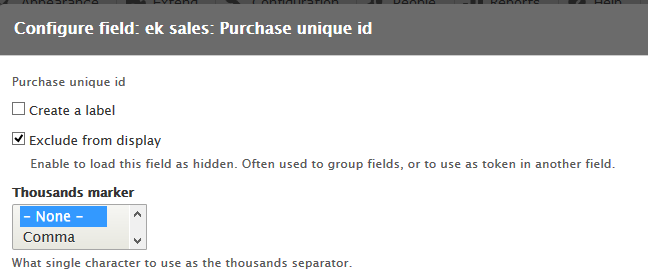
First we click on ek sales Purchase unique id (ID) to edit its configuration: hide from display and remove comma separated formatting:
Then we click on the field ek sales: Serial number (Ref.) to edit its configuration. In the "REWRITE RESULTS" section, we select "Output this field as a custom link" and enter the path to the document with ID:
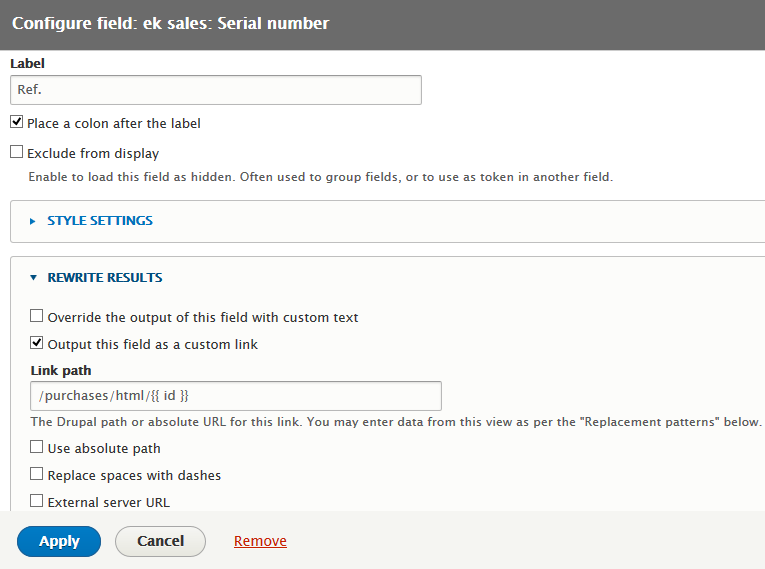
{{ id }} indicates a variable element which is equal to the value of the row ID. If you do not indicate the proper variable, the link will not work.
Now the view display shows Ref. column with hyperlink to the document and the ID column is hidden.

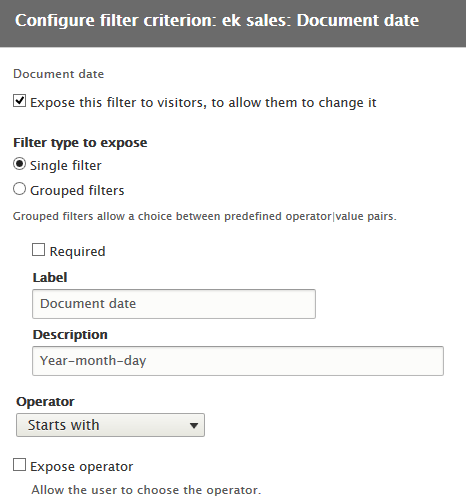
Add a filter by date
To help user select data from view, the next step shows how to include a filter. The filter will select purchase rows based on date field.
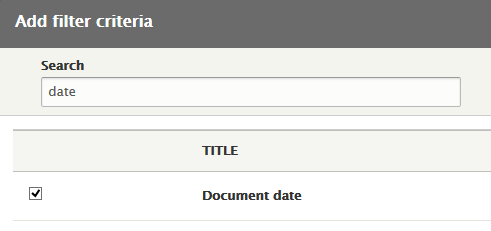
First, click "Add" in the filter section:
![]()
Select the date field:
And configure with following settings:
-
Expose this filter to visitors, to allow them to change it
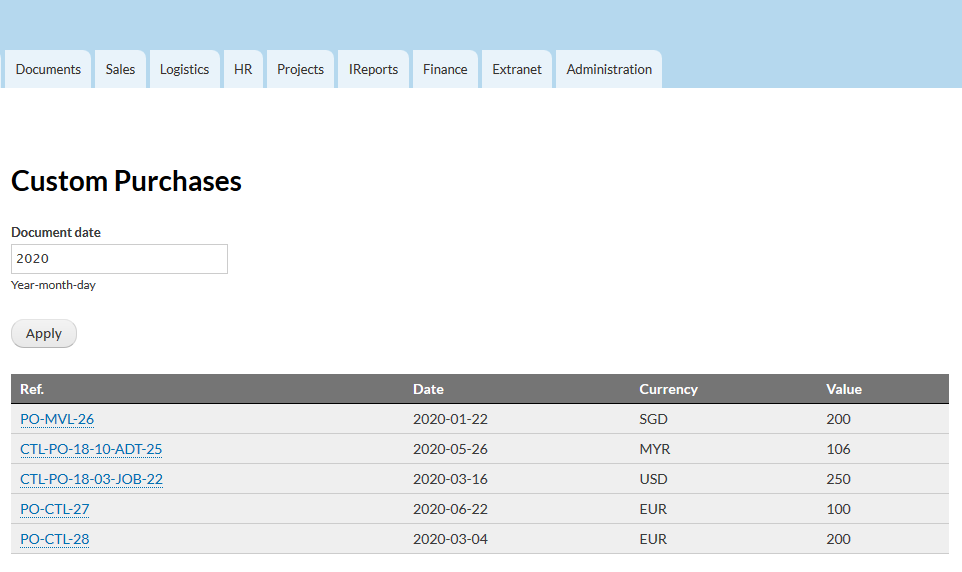
A new box is included in the view to filter content by date:
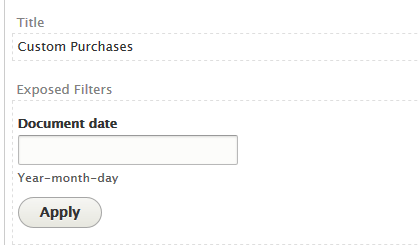
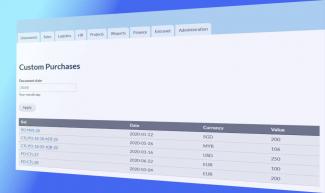
The View "Custom Purchases" is now completed and it can be accessed by users via default path /custom-purchases indicated in the view form (you can edit this path to any valid path you want to set) :
In the next article, we will look at table relationship to link data with other tables and other display enhancements.
You can also watch our video for building a custom view:
Add new comment